Flat Correction Properties
The Flat Correction Properties methods are
used by Express Image Calibration to calibrate source images
for removing variations in illumination and wavelength-dependent
sensitivity across the sensor. To apply a flat correction,
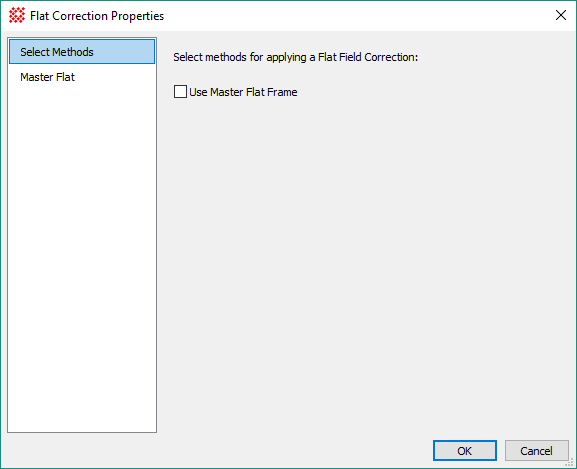
configure the correction on the Master Flat page and check
the box for ![]() Use Master Flat Frame on the
Select Methods page.
Use Master Flat Frame on the
Select Methods page.
The flat field correction has an option to normalize the flat to a central signal level of 1.0 so that, when dividing the flat correction, the central signal of the source image is retained. Properly created flats are usually saved with 32-bit and 64-bit real pixels and are pre-normalized to 1.0. If using flats having 8, 16, or 32 bit integer pixels, you will need to use the normalization option and select the Normalization statistics on the property page of the selected method.
To use this method correctly, both the CCD bias and dark (thermal) corrections have already been applied to the master flats and source images.
Select the flat field correction method (or no correction) using the box on the Select Methods page as shown below.
Use this method to correct source images for variations in both illumination and sensitivity. Since sensitivity variations are usually wavelength dependent, this method gives good results when the filter used to acquire the flat field frames is the same as used to acquire the source images.
This method can be configured in 3 ways: 1) to apply the master flat without regard for the filter, 2) process only source images using a master flat that matches the specified filter, or 3) search the list of master flats for a match to the filter used for the source image. When filter matching is used, Mira chooses the first flat in the list that matches by filter.

Master Flat Properties
|
Browse |
Click this button to open a file browser for selecting flat files to populate the file list window. |
|
Clear List |
Click this button to clear the current file list appearing in the file list window. |
|
|
Check this box to append browsed files to the files already appearing in the file list window. If unchecked, the browsed files replace files appearing in the window. |
|
|
Check this box to save the file list when exiting the Flat Correction Properties dialog. |
|
Criteria for choosing flats from the list |
These options control how flats are selected for use from those in the file list window. |
|
|
|
|
Filter Keyword |
When filer matching is used (options 2 and 3), the filter keyword must be used to determine whether the flat matches the source image. Usually this keyword is named FILTER, but any name can be used, even if it does not actually apply to an optical filter. |
|
Filter Value |
When a specific filter is to be matched (Option 2), this value specifies the name of the filter to be used. |
|
|
Check this box to normalize the flat to a reference brightness of 1.0 before applying to the source image. |
|
Normalization... |
Click this button to open the Region Statistics dialog for configuring the calculation of the statistics used to normalize the flat frame to a reference brightness of 1.0. |
|
Error value for divide by 0 |
Enter the numeric value used to replace pixels in the corrected image that correspond to the location of a 0 pixel in the flat. |