Examples of Adding Labels to an Image
The examples below show the process of adding labels to an image. See Adding Labels to Images for a description of the procedure. To make the changes shown below, the Label Preferences Dialog was used for changing the marker and font and the Change Label Text dialog was used to change the actual text of the annotation. Commands operate from the Label Toolbar visible on the left margin of the Image Window.
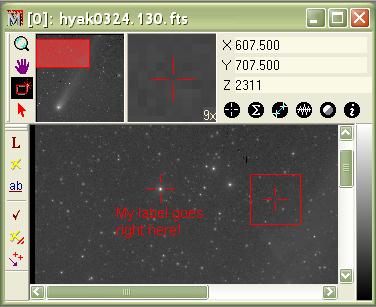
The first image shows the screen after marking the first label. The mouse pointer was clicked on the star to mark the location. The label's text was then typed into the Change Label Text dialog. Clicking [OK] on the dialog created the label.
The label's background mode was set to transparent
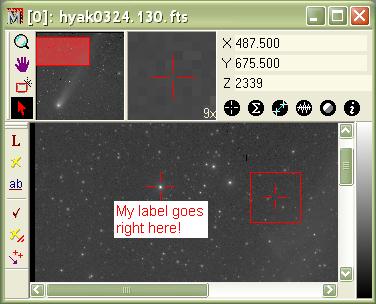
in the picture above. To make it easier to see, but wipe out the
details behind, the background was made opaque. Clicking ![]() on the Label Toolbar opened the Label Preferences
dialog. In the dialog the Opaque box was checked and the
background color set by clicking the Canvas button. This
produced the image below.
on the Label Toolbar opened the Label Preferences
dialog. In the dialog the Opaque box was checked and the
background color set by clicking the Canvas button. This
produced the image below.
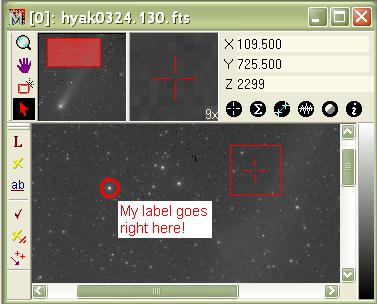
Next, the label' marker was changed from a crosshair to a line in the Label Preferences dialog. While the dialog was open, the label's length was increased using the Width and Height preferences and the Text position was changed from Below to Lower Right.

The next figure shows the marker changed from a line to a circle. In making this change, the line Thickness value was changed from 0.75 points to 1.5 points in the Label Preferences dialog.
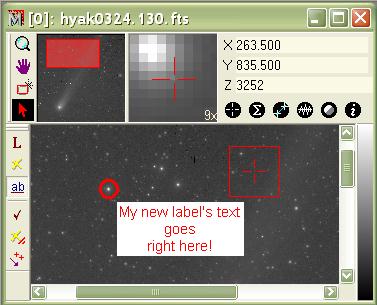
Finally, we decided the text was not quite right.
Clicking ![]() on the Label Toolbar
switched to Label Change Mode.
Clicking the mouse pointer on the label's marker opened the
Change Label
Text dialog where the text was changed to that shown below.
on the Label Toolbar
switched to Label Change Mode.
Clicking the mouse pointer on the label's marker opened the
Change Label
Text dialog where the text was changed to that shown below.
With the label in final form, it was copied to the Windows Clipboard using Edit > Copy, then pasted into a Microsoft Word document using Edit > Paste in Word.