Examples of Labeling Images
The examples below show the process of adding labels to an image. See Labeling Images for a description of the procedure. To make the changes shown below, the Label Properties Dialog was used for changing the marker and font and the Change Label Text dialog was used to change the actual text of each label. Commands operate from the Label Toolbar shown on the left margin of the Image Window.
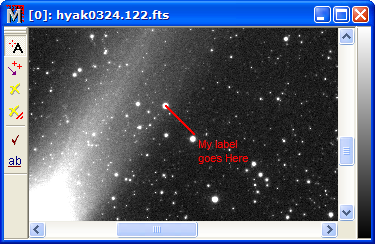
The first picture below shows the screen after marking the label. The mouse pointer was clicked on the star to mark the location. The label's text "My label goes here", with the line break, was typed into the Change Label Text dialog.
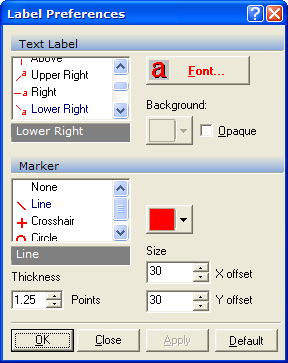
To change the properties of labels, click ![]() on the Label Toolbar to open the Label Properties dialog
as shown below. After making changes, click [OK] or [Apply] to
change properties of all labels in the current Image Window. Click
[>> Default] to make the
setting permanent for all future labels:
on the Label Toolbar to open the Label Properties dialog
as shown below. After making changes, click [OK] or [Apply] to
change properties of all labels in the current Image Window. Click
[>> Default] to make the
setting permanent for all future labels:
To make the next picture, the label Marker was changed from a Line to a Crosshair:

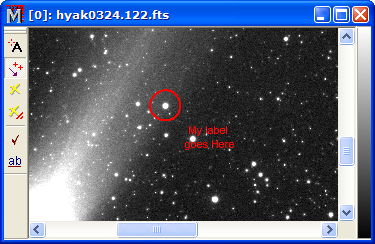
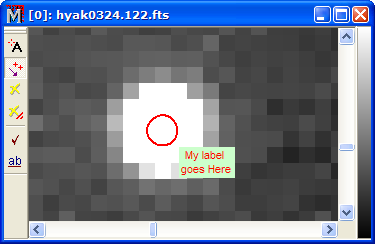
For the next picture, the Marker was changed to a Circle:
For the next picture, the Opaque option was checked. This enables the background Color selection button. The background was set to black:

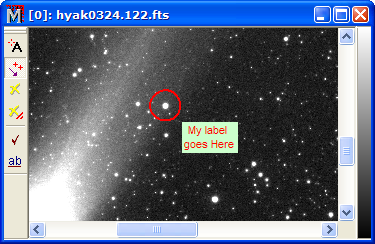
Then the background Color was changed to lime green:
The next picture shows that label sizes are independent of the image magnification. The image was magnified 16x. Notice how the label remained the same size:
With the label in its desired format, you can copy it to the Windows Clipboard using Edit > Copy, then paste it into a document in other software using that program's Edit > Paste.
Mira Pro x64 User's Guide, Copyright Ⓒ 2023 Mirametrics, Inc. All
Rights Reserved.