Initializing Toolbars and Docking Panes
When you run Mira the first time after installation, and sometimes after a major update, the main Toolbars and Docking Panes are not initialized. This causes the toolbars to appear bunched along the top and window panes to open filling the central space of their parent window.
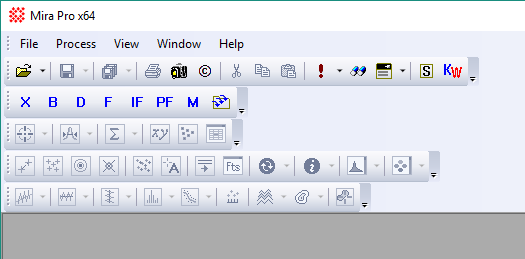
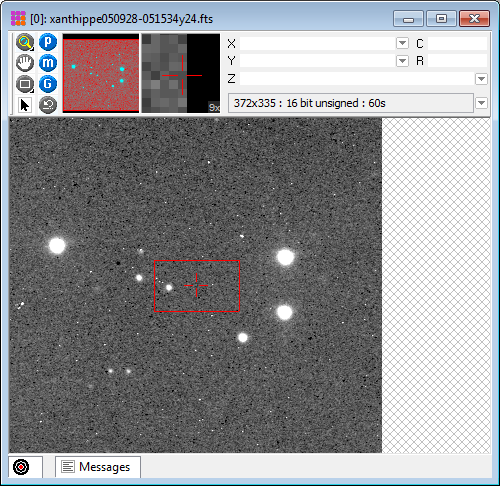
The Mira application opens the first time with each of the main Toolbars created on a separate line as shown below.
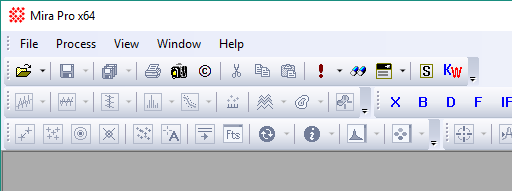
The default toolbar positions waste a lot of screen space, so you may with to merge toolbars into 2 rows or position them vertically along the left border as shown below.
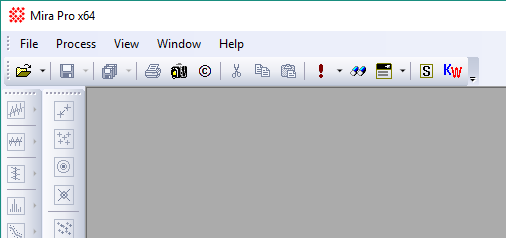
To position a toolbar, drag it using the "gripper" on the left or top end of the toolbar. You can also move the menu bar in the same way. They can be positioned along any horizontal or vertical border. Repositioning a toolbar may take two steps: a first step for choosing the alignment border, and a second step for finely positioning along an existing row of toolbars.
The layout of toolbars and menus is automatically saved when you exit Mira and automatically loaded when you run Mira the next time.
When you open a Docking Pane the first time, it is not initialized,
meaning that it uses a default layout with a pre-determined
position and size. The Image Window contains most of the docking
panes. When measurement panes and other panes open the first
time, by default they stack next to each other using up the
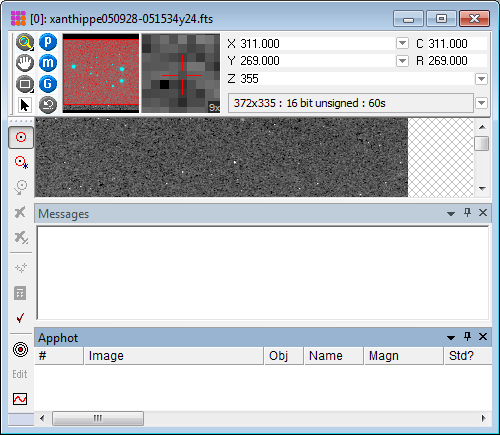
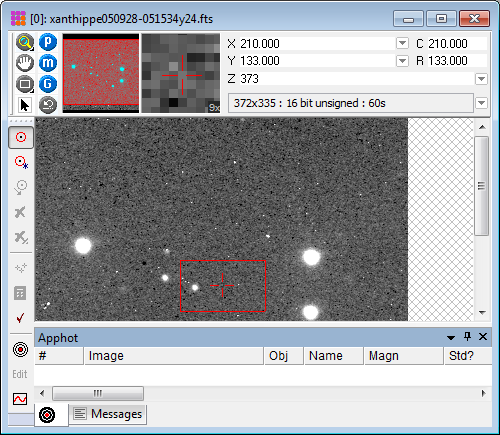
available view space inside the window. For example, click the
![]() (Aperture Photometry) button on
the Image
Measurements Toolbar and Mira opens the Apphot measurement Pane and a
Message pane as
shown below. Initially, both panes are pinned open:
(Aperture Photometry) button on
the Image
Measurements Toolbar and Mira opens the Apphot measurement Pane and a
Message pane as
shown below. Initially, both panes are pinned open:
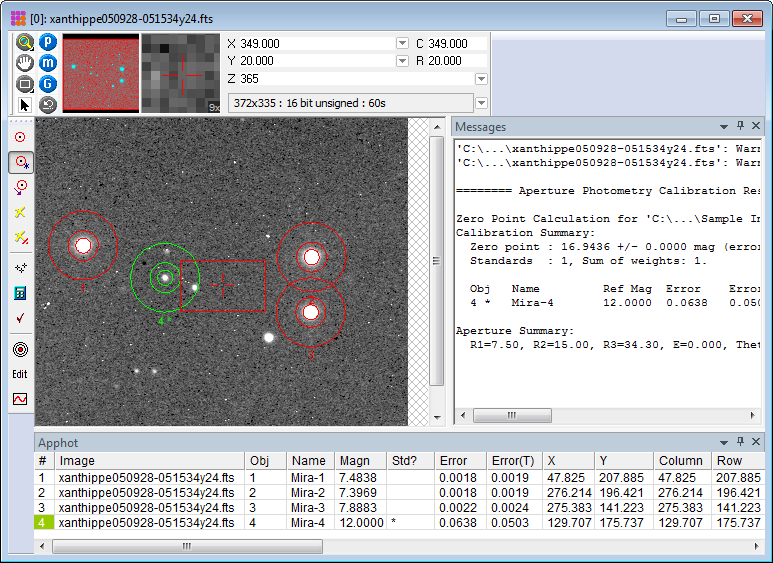
You might enlarge the Image Window so that the panes expose more of the image. Alternatively, you could tabify one or more panes so they are shrunk to tabs along the window border as shown below. To tabify a pane, click the stick-pin button in each pane's title bar. In the picture below, notice that both panes have been tabified along the bottom window border.
With the docking panes tabified, you might open one pane or the other momentarily for a peek at its contents simply by hovering the mouse over the tab. Or you could pin one pane open and keep the other tabified.
Another pane layout alternative is to create a pane group. All panes in a pane group overlap so that opening one opens all of them and tabifying one pane tabifies all of them. To switch between panes in a group, simply click their tabs.
To create a pane group, pin open each pane to be grouped. Then grab one pane by its title bar and drag it on top of the other pane or the group. For these two panes you would get the following:
To remove a pane from the pane group, grab its tab and drag the tab away form the group's tab row.
Finally, here is another useful layout using 2 borders instead of a pane group;
Unlike the situation for menus and main toolbars,
the docking pane layout is not automatically saved. To save the
docking pane layout for a specific type of window (for example,
Image Windows),
make the target window top-most and click the ![]() button on the main toolbar. The
saved layout applies to all new windows of the same type. For
example, saving the pane layout for an image window results in all
future image
windows opening using its most recently saved layout.
button on the main toolbar. The
saved layout applies to all new windows of the same type. For
example, saving the pane layout for an image window results in all
future image
windows opening using its most recently saved layout.
Mira Pro x64 User's Guide, Copyright Ⓒ 2023 Mirametrics, Inc. All
Rights Reserved.