Running the Source Extraction Pipeline
Execute the Measure > Extract Sources command
to open the toolbar. Then click ![]() to open the
Source Extraction dialog shown below.
to open the
Source Extraction dialog shown below.
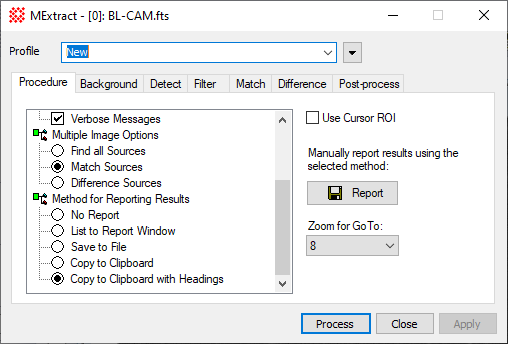
Now configure the Properties to control your extraction procedure. You can select an existing Profile or set the Properties as you need. Then choose one of the following actions:
To run the extraction pipeline, click [Process] at the bottom of the dialog.
To save changes to a new profile, use the profile control.
To update the currently selected profile, click [Apply].
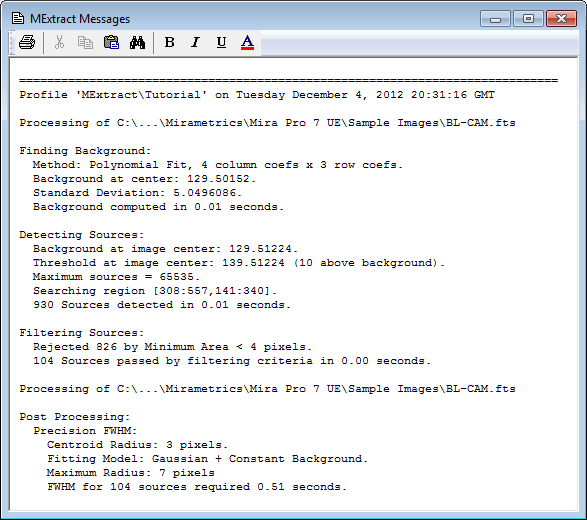
During the extraction processing, status messages can be archived to a text window. If the Verbose box is checked on the Procedure page, then messages are listed in the Source Extraction Messages window shown below. The messages listed depends on which Operations and settings are selected on the pages of the Source Extraction dialog.
After the source extraction procedure finishes, the detected and filtered sources are marked as labels on the image as shown below. Note that can change the source markers and labels using the Marker Properties command from the Source Extraction Toolbar.
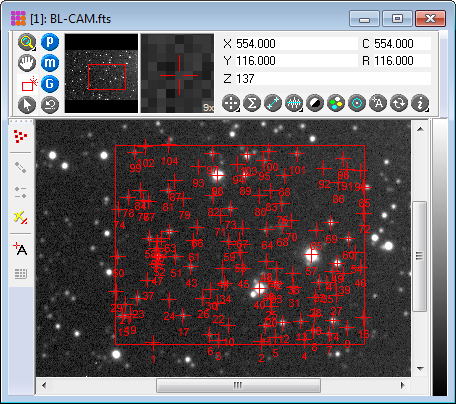
The image window can, of course, be magnified or otherwise adjusted to get a better view of the sources.
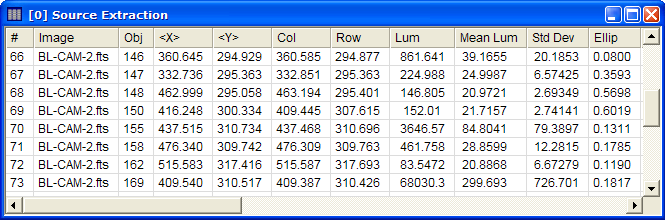
The Procedure lists several Reporting options that control what happens to the extracted properties. If you want only to show markers for detected objects, you can choose the No Report option. Otherwise, you can save the properties to a Report window or to a text file. If the List to Report Window option is bulleted, the data will be listed to a window like this:
When a large number of objects is detected in an image (for example, when there are truly many sources, the image is large, the detection threshold is low, or by neglecting to use strong filtering criteria), then labeling the sources and listing them to the Report window can take a long time. If you do not need the results displayed immediately, consider de-selecting the Label step or choosing No Report in the procedure. If needed at a later time, you can list the results or save them to a text file using buttons on the Procedure page.
The table has a Go To command which allows you to jump from an interesting object in the report to a close-up view of the object in the image window. To use this tool, right-click on the row of the target object and then select Go To Object from the pop-up menu. The image window will re-center on the target object (provided the object is not too near the image edge to be centered in the window). The magnification of the centered view is controlled by the Zoom for Go To parameter on the Procedure page.
Introduction to Source Extraction
Mira Pro x64 User's Guide, Copyright Ⓒ 2023 Mirametrics, Inc. All
Rights Reserved.