Tutorial: Cleaning Artifacts from an Image Set
This tutorial shows how to use the Clean Image Set command to remove non-reproducing artifacts from an image set. Here, the term "artifact" refers to random events, such as cosmic rays and radioactive decay tracks, that are detected at a given location in an individual image but do not reproduce as persistent features in each of the images of the image set. If the images are not registered to within 1 pixel before using this command, you will need to register them using one of several available methods. If the images are astronomical and are tracked to within 1 pixel or better, they are sufficiently well aligned to use this function without registration.
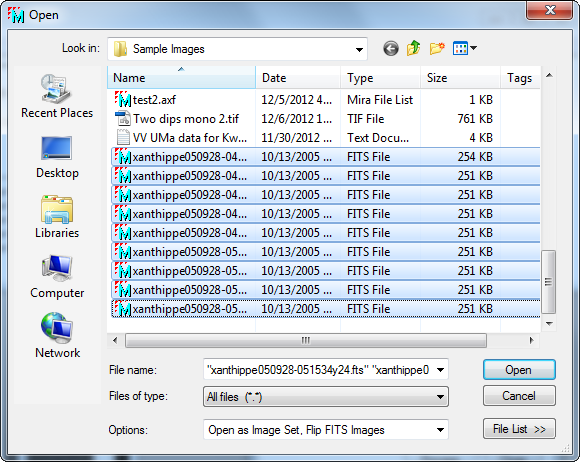
The first step is to open the target images as an Image Set so that they are all in the same Image Window. Navigate to the folder containing the sample images installed by Mira and open the Xanthippe*.fts set using the File Open dialog as shown below:
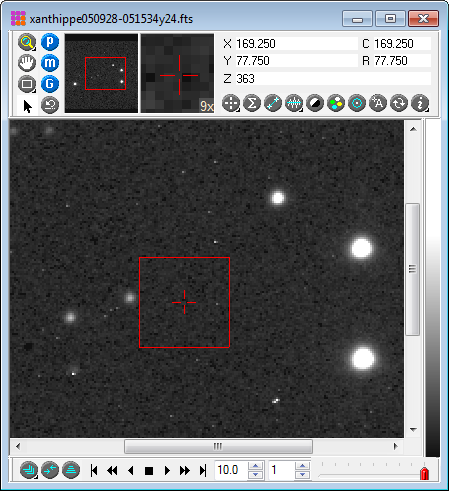
In the Options list box at the bottom of the Open dialog, notice the Open as Image Set parameter. If this is not visible click the down-arrow on the list box and check this option to select it. Click [Open] to open the images in a single window as shown below, The Transfer Function settings are [Entire image, 99.5%, Gamma, Gamma=0.52].
Next, make sure the Image Window is on top so its command menu is shown at the top of the Mira screen. From the menu, choose Process > Calibration > Clean Image Set. (Note: Since this algorithm needs to create a statistical model from a sample of images, it does not work for a single image. Therefore, if an image set is not displayed in the current top-most window, the command is disabled.) The Clean Image Set command opens as follows:
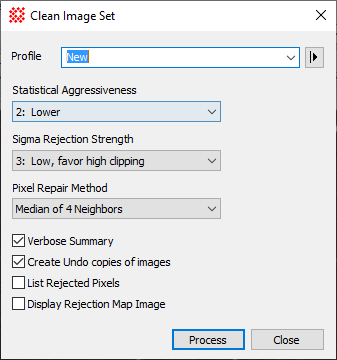
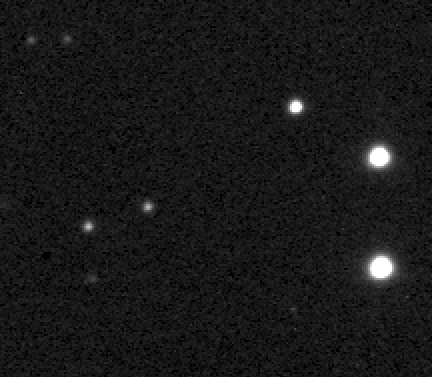
Set the Properties of the Clean Image Set dialog exactly as shown above, then click [Process]. After a moment of processing, the images will be updated in their window and appear as shown below. Compare the picture below with the picture above to see the improvement. Notice that the image set selection bar at the bottom of the window is set to the same image (the last image) as shown here.
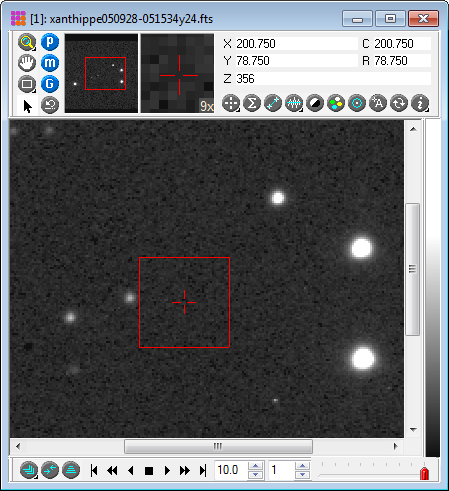
Before processing, the first image has a radiation event about 1/5 the way inward from the lower left corner and it falls upon a star. In the processed image, this artifact was effectively repaired while preserving the star. Just this one artifact would be laborious, if not impossible, to repair using a single image where the comparison values are taken from nearby pixels.

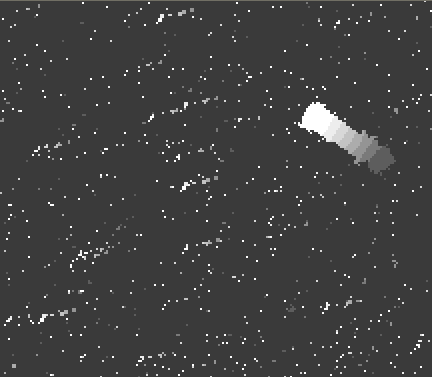
Below is the pixel rejection map image produced when the Display Rejection Map Image check box is checked. The map Image contains a pixel value that is the index of the image in which the event was detected. For example, a value of 1 indicates a pixel rejected in image 1 of the image set. Near the upper right of the image, notice the moving blob which corresponds to the minor plant Xanthippe that was moving during the acquisition of the image set. The trail has values ranging from 1, at the lower right, to 9 at the upper left, which corresponds to images 1 through 9 of the image set. This illustrates the limitation of the method: it will detect the pixels of a "significantly" variable object or transient object as an "event" and reject it. How significant is "too significant" depends upon the image properties and your particular application.
Repairing Artifacts and Cosmetic Defects
Mira Pro x64 User's Guide, Copyright Ⓒ 2023 Mirametrics, Inc. All
Rights Reserved.