Extracting Sources from Images
The MExtract Module contains a suite of
functions that detect and measure the properties of luminous
sources in images. These functions act as a "pipeline" that can be
configured to handle a wide variety of tasks. Sources, or "blobs",
of any shape may be found and characterized using this package.
Extracted properties includes coordinates, luminance, intensity
moments, ellipticity, and many other attributes. Applications for
source extraction range from generating coordinate lists for
objects of similar size, to mapping optical distortions and CCD
artifacts, quantifying the characteristics of "blobs", and
detecting transient objects among a pattern of fixed sources, as
well as many others. When multiple images are loaded as an image
set, you can switch between processing the entire image set or just
the active image by setting the active state of the Measure
Image Set flag
using, for example, the ![]() button
on the Image
Toolbar.
button
on the Image
Toolbar.
MExtract operates from a toolbar opened
in the target image window. With the target image window top-most,
open the toolbar using the Measure > Extract Sources command or the ![]() button on the main toolbar.
button on the main toolbar.
The extraction processing is controlled by parameters in the Source Extraction Dialog. A profile control manages collections of parameters that apply to any number of different extraction strategies. For example, you might have one profile for creating a collection of blobs that are highly elongated, another profile for detecting transient sources in image sets from a particular experimental setup, or other profiles that identify objects that are tiny and of high brightness. Since your source extraction procedure will always be executed in a particular sequence of commands that each take their input from prior results, it is known as a "pipeline". The pipeline can process just one image or a stack of images, depending on the state of the Process mage Set flag for the image window.
Tutorial: Introduction to Source Extraction
Running the Source Extraction Pipeline.
The extracted object properties are described in Source Extraction Definitions.
Unlike most other toolbars in Mira, commands on the toolbar do not activate interactive command modes for marking or drawing on the image. Instead, on this toolbar, the buttons operate commands in the MExtract package. The
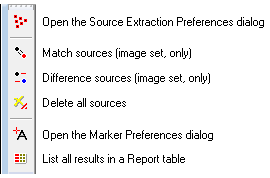
The middle buttons, ![]() and
and ![]() are discussed
under "Working with Multiple Images", below.
are discussed
under "Working with Multiple Images", below.
The extraction processing involves a "pipeline" that connects a number of steps. Each of these steps is optional:
Calculating the Background threshold for identifying sources.
Detecting sources above the threshold and calculating their properties.
Filtering the detected sources according to selection criteria.
Merging the source lists (for an image set) to retain only those sources found in all images.
Differencing the source lists (for an image set) to retain only those sources found in some images.
Labeling the final source collection by drawing markers on the images.
Reporting the extracted properties for the final source list(s).
Note that the Merging and Differencing steps pertain only to processing of image sets. These operations work with the lists of objects extracted from the images by matching the source coordinates. These operations are also available after the pipeline has been executed. See "Working with Multiple Images", below.
After completion of the extraction pipeline, the final sources may be listed and marked. To choose how this will be done, choose an option under the Reporting section of the procedure on the Procedure page.
After the extraction pipeline has been run, you can list the results using one of these methods:
Click ![]() on the toolbar
or click [List] on the Procedure page
to list results in a Report window.
on the toolbar
or click [List] on the Procedure page
to list results in a Report window.
Click [Save] on the Procedure page to list the results into a text file.
Source Detection involves identifying all pixels above a threshold, then growing them into isolated sources and measuring the properties of the sources. This involves a process known as image segmentation. As mentioned in "Overview", above, this process involves 4 operations, but all 4 are optional. To select which phases are performed, check boxes on the Procedure page of the Source Extraction dialog.
Detecting source pixels depends upon two values:
The background value, which must be subtracted from each pixel, and
The threshold value, which each pixel must exceed to be included in a source.
The background may vary over the image, but the threshold is a fixed amount above the local background. Any pixel value that exceeds the detection threshold above the background is included in a source. Sources are allowed to grow and absorb other sources if they are found to be "8-connected". this definition of connectivity considers a pixel connected to another pixel if they meet on any one of the 8 eight possible points or sides surrounding the pixel. Sources are merged until the source list consists only of isolated "islands" that are not 8-connected with any other sources.
After the detection phase, a set of more than 20 properties is computed for each source. If the image has a World Coordinate System calibration, this set includes the world coordinates of the source center. If the Filter operation is enabled, then the list of sources is culled according to the specified filtering properties, keeping only those sources that meet the filter criteria. After passing the filtering phase, the optional precision measurement options may be applied as post processing steps. Of these, the FWHM is an especially CPU intensive operation, so it is advisable not to use it unless the FWHM value is needed (notice the CPU time listed for various steps in the Message window shown above). The final set of extracted sources and their properties may be marked on the image, tabulated in a Report window, or saved in a text file for external processing. Select the destination under the Reporting option on the Procedure page.
When the image window contains an image set, you can use source extraction to identify only those sources that appear in all images or only those sources that appear in some of the images (i.e., transient or moving sources). These options exist in addition to simply finding all sources matching your extraction criteria. On the Procedure page, the Procedure box lists 3 choices under the Multiple Image Options heading: Find all Sources, Match Sources, and Difference Sources. The latter two options correspond to preferences that are set on the Match and Diff pages of the Extract Sources dialog. These three options are defined in the table below.
|
Multiple Image Options |
|
|
Find All Sources |
Choose this option to detect and measure all sources in all images. |
|
Match Sources |
Choose this option to match source lists using the coordinates of the extracted objects. This option deletes all sources that are not detected at a similar position in every image of the image set. Matching preferences are specified on the Match page. |
|
Difference Sources |
Choose this option to difference the source lists by their coordinates. This removes from the results all sources that are not detected at a similar coordinate in the entire image set. Matching preferences are specified on the Difference page. |
If you choose the Find all Sources option, then the sources detected on each image will not necessarily correspond, since each image is processed independently of the others. Use this option if you do not need to establish a link between the sources in different images, such as when searching for variability or when searching for either transient or moving sources. Conversely, when the Match or Difference option is selected as part of the procedure, they are applied during the pipeline processing. Using these options, the sources that are post-processed and/or labeled on the images will be a reduced to a smaller set and the details of "all" sources will be lost.
To give you more versatility when extracting from
multiple images, the Merge and Difference operations are also
available as buttons on the toolbar which can be used after the
pipeline has been run using the Find all
Sources option. The ![]() (match)
and
(match)
and ![]() (difference) buttons are
enabled only if the image window contains an image set. These
buttons duplicate the Match Sources and
Difference Sources steps in the
procedure. These are used after a procedure has been run on an
image set with the Find all Sources
option selected to identify and label all sources in all images.
Using these buttons, you can then cull the final source list to
leave only the sources that are matched in all images or the
sources that appear in only some of the images.
(difference) buttons are
enabled only if the image window contains an image set. These
buttons duplicate the Match Sources and
Difference Sources steps in the
procedure. These are used after a procedure has been run on an
image set with the Find all Sources
option selected to identify and label all sources in all images.
Using these buttons, you can then cull the final source list to
leave only the sources that are matched in all images or the
sources that appear in only some of the images.
When source properties are listed in a Report window, Mira provides several tools for doing quick evaluation of the results. These options include scatter plots and other adjustments of the table (see Working with Report Data). However, note that the Report window lists most, but not all, of the calculated properties of the extracted sources. All properties are, however, saved when you choose the Save to File option in the Reporting options for the procedure.
See Source Extraction Definitions for a description of all measured source properties.
Extract Sources command, Measuring Images, Running the Source Extraction Pipeline, Source Extraction Dialog, Source Extraction Definitions, Introduction to Source Extraction, Report Windows